Lighting Your Art Installation
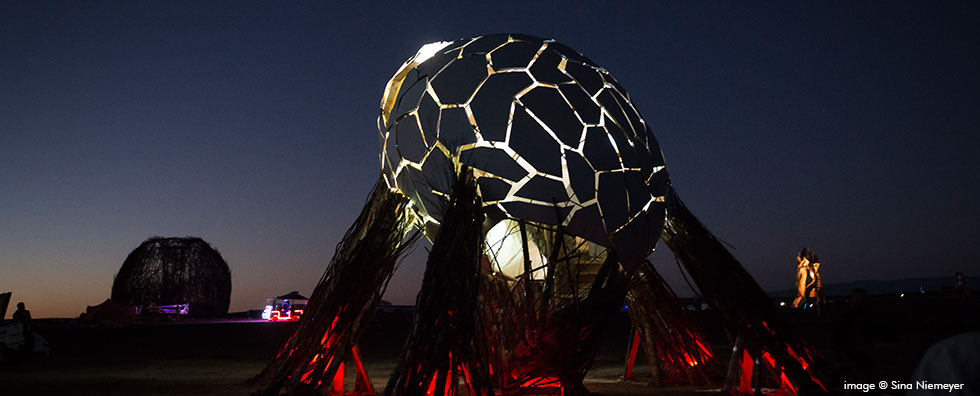
One of the major design steps in bringing art to Tankwa Town is deciding how to light your artwork and incorporate lighting into your piece.
The goal is to make your art visible at night to:
- Prevent destruction of your art from accidental art car/bike/pedestrian collision.
- Prevent injury to participants.
- Look awesome!
General Guidelines for Lighting Design
People should be able to see your artwork before they arrive at it.
360 degree safety and lighting is important. As most lighting is directional, ensure no dark spots in your lighting design by putting up spot-lighting or consider also adding perimeter lighting.
Lighting your art should be considered in the art’s design, not as an afterthought.
Light Your Rebar
This structural part of your project is often overlooked and is one of the largest causes of injury in the Binnekring. Make sure to mark it well!
Enhance Your Lighting System
Mirrors, reflective tapes, reflectors, and other shiny surfaces can reflect not only your deliberate lighting, but also headlights from oncoming vehicles.
Unacceptable Forms of Light
There are many forms of light for you to choose from. See below for more info on the encouraged forms, but please do NOT use
- Chemical lights (“glow sticks”): they don’t last an entire night and are bad for the
environment. - Fuel lanterns: no unattended flames are allowed.
Acceptable Forms of Light
Electroluminescence
Highly portable, flexible, and customisable, electroluminescent (EL) panels and/or wire.
Available in neon/fluorescent colors, different shapes and diameters.
Can be powered with simple or sophisticated lighting controllers.
Incandescent lighting
Highly accessible.
Available in standardized packages.
Generates light omnidirectionally.
Consumes a lot more power, produces more heat, and is far more fragile than their updated counterparts.
LEDs
Highly efficient, effective alternative to conventional lighting.
Compact.
Available in an array of colors.
Easy to power and control.
Perform well in extreme environments.
Neon
Highly efficient.
Consumes little power in operation.
Can last for years if utilised properly.
Since neon tubes are made of glass, consider placing them out of reach to guard against breakage.
Rope lights
Available as incandescent bulbs or LEDs.
Inexpensive solution.
Can make a great demarcation, point of reference, and/or general area light.
Solar lights (garden lights, etc.)
For ground-mounted solar lights, consider lifting them up and off the ground in an attempt to keep dust from accumulating on the integrated solar panel and/or LED light, which can greatly impair their functionality.
Can be used for perimeter marking or accents, but not very bright and should not be considered main source of lighting.
If not staked down properly, can be blown away or get stolen.
For larger solar light installations that require solar panels:
See section below
You Are Responsible for Making Sure that Your Artwork is Lit Throughout the Event
No matter the source of power you’re using, it needs to be checked daily prior to sundown to ensure your art will be lit throughout the night.
Powering With Solar
Before acquiring components, it’s important to take the time to properly design your system around whatever you may be powering. Keep in mind that the more components you add, the larger the solar system will be. Always build margin into solar systems, be sure to account for no/low solar days, plan for worst-case scenarios and bring along additional components to perform on-site repairs. Solar systems require daily maintenance to remove dust and check connections.
This basic overview is designed around lighting loads, so these solar systems are
considered small, at/under the 100 watt range.
The core components of a basic solar system consist of:
Solar Panel(s)
Generate low voltage dc power, typically 12vdc, identical to the power generated by your vehicle through a cigarette lighter plug.
When choosing your solar panel, think of how it’ll be mounted. Whether it’s ground-mounted (will require perimeter lighting), pole-mounted or mounted directly to your art, make sure that your solar panel is properly secured.
When securing your system, take wind load, dust, potential impeding shadows, and electrical grounding into account.
Mounting a solar panel flat reduces its efficiency.
Charge Controller
A protective, inline device that manages the power produced by the solar panel prevents the battery from being overcharged and/or potentially damaged.
Some charge controllers integrate a photocell and/or timer functions, enabling system
autonomy.
If your charge controller does not offer these functions, you may consider adding one so you don’t have to physically turn your lighting on/off every day.
Battery
Size and capacity is determined by your power load.
Important to have enough power to account for poor solar conditions.
Prefers stable, cooler temperatures (keep out of direct sunlight, consider a ventilated enclosure which can also double as a space for other solar equipment and wiring).
Wiring and Connectors
To connect solar panel to charge controller, charge controller to battery, battery to your
lights.
Ensure all wiring is properly anchored to avoid potential trip hazards.
Re-using Your Lighting
Post-event, your lighting system can be used for future years if it is in good condition.
Consider donating your unneeded lighting objects to avoid them ending up in a landfill.


